Game Boy Modding Workshop in Akihabara | Build and Take Home Your Own Console in About 2 Hours
In Akihabara, take apart a genuine 1990s Game Boy and rebuild it with an IPS screen and shell/buttons of your choice, in a roughly two-hour workshop. English-speaking staff guide you through every step, and once your console is complete, you can play it on the spot and take it home.
Published:
Content verified by the operatorPhotos courtesy of Mod Tokyo
This page contains affiliate links.
Prices and ratings are as of 2026.09.21. Please check the booking page for the latest details.
BEFORE YOU BOOK
4 Things to Know Before Booking
- 01Take apart and rebuild a genuine Game Boy with your own hands, then take it home
- 02Choose your IPS screen, shell, and buttons for a truly one-of-a-kind design
- 03All tools and parts provided—English-speaking staff guide you carefully, no experience needed
- 04Open to ages 6 and up, making it a great activity for the whole family
BEST FOR
Who This Experience Is Best For
- 01
Anyone who wants to build something with their own hands and take it home
Rather than buying a finished product, you handle everything from disassembly to reassembly yourself. You leave with a one-of-a-kind, fully working console.
- 02
Retro gaming fans
You'll work with a genuine 1990s console and can learn about the history of handheld gaming while surrounded by a wall of vintage collectibles.
- 03
Families looking to join together
Open to participants from age 6, with minors required to be accompanied by a guardian. Non-participating companions can also join for free.
When to Compare Other Options
Even without technical experience, English-speaking staff stay with you through every step, so even first-time tool users can complete their own console.
Akihabara, the gaming district, and a classroom lined with Game Boys
The workshop space is located in the Akihabara area of Tokyo, about a 2-minute walk from JR Kanda Station and 13 minutes from Akihabara Station. The session runs approximately 2 to 2.5 hours, and arrival 10 minutes before the start time is recommended.
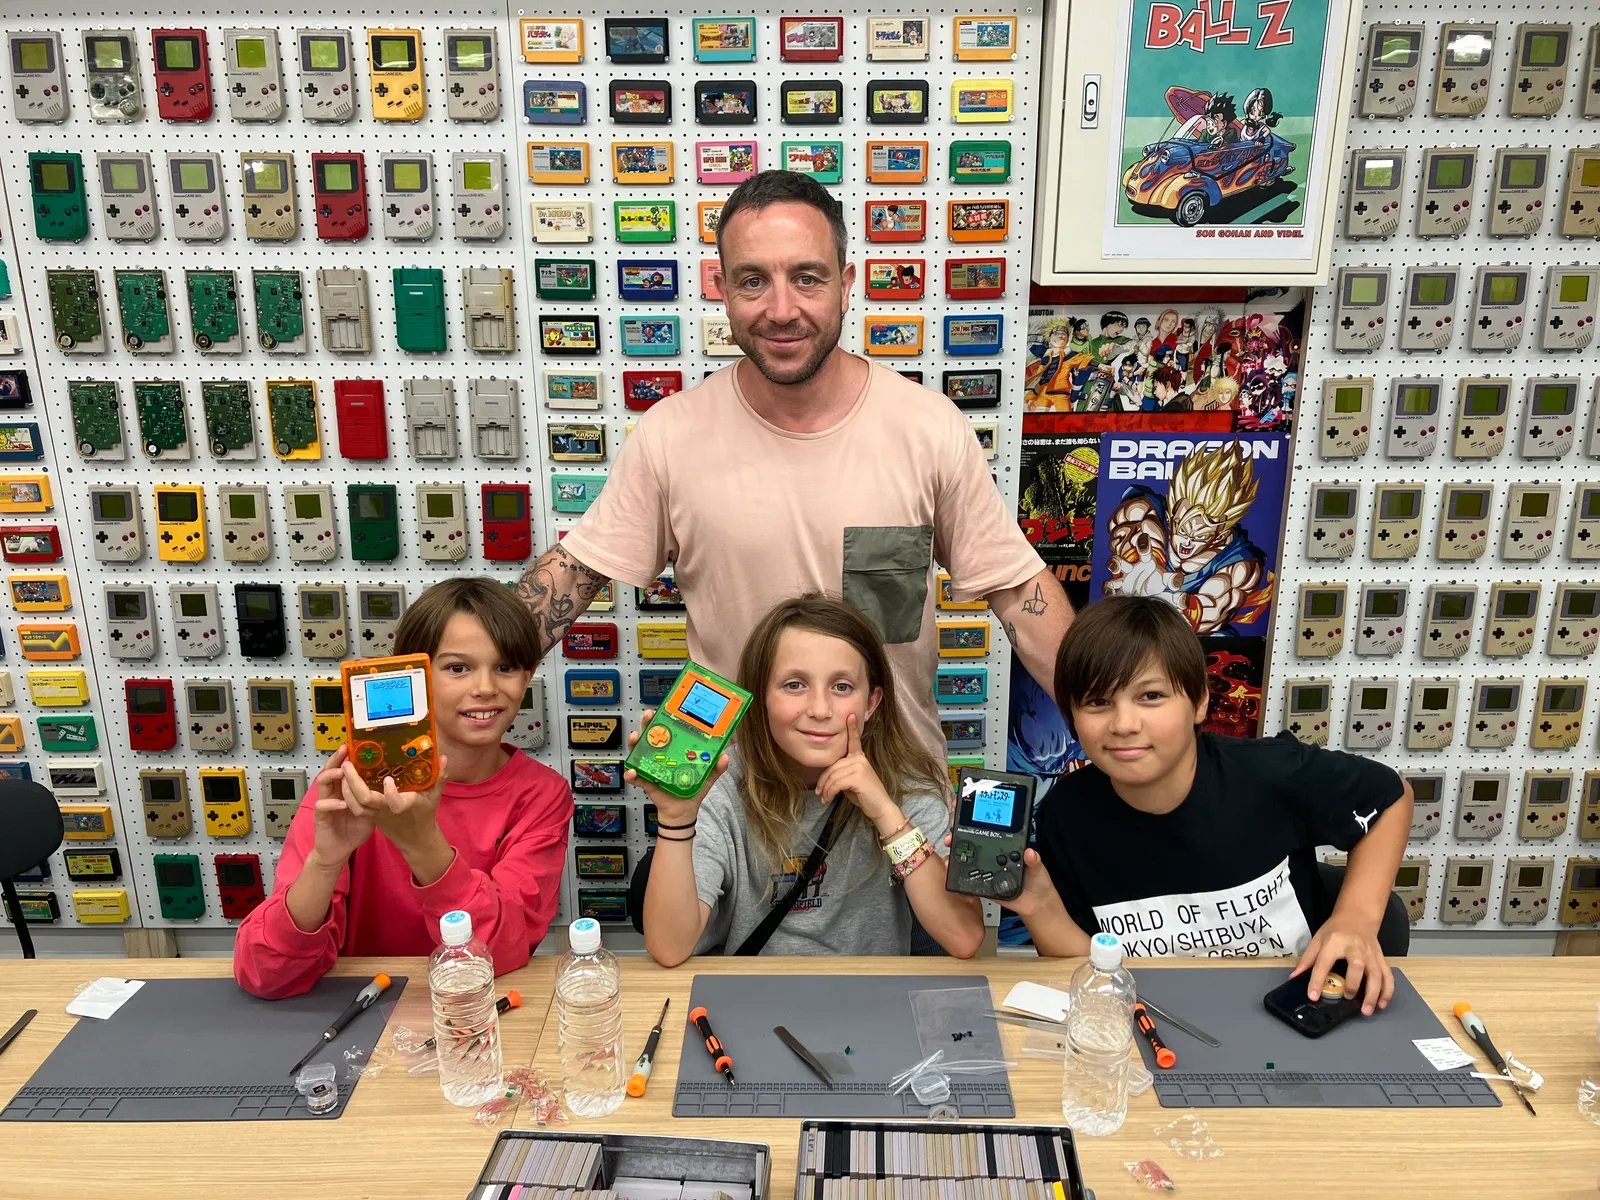
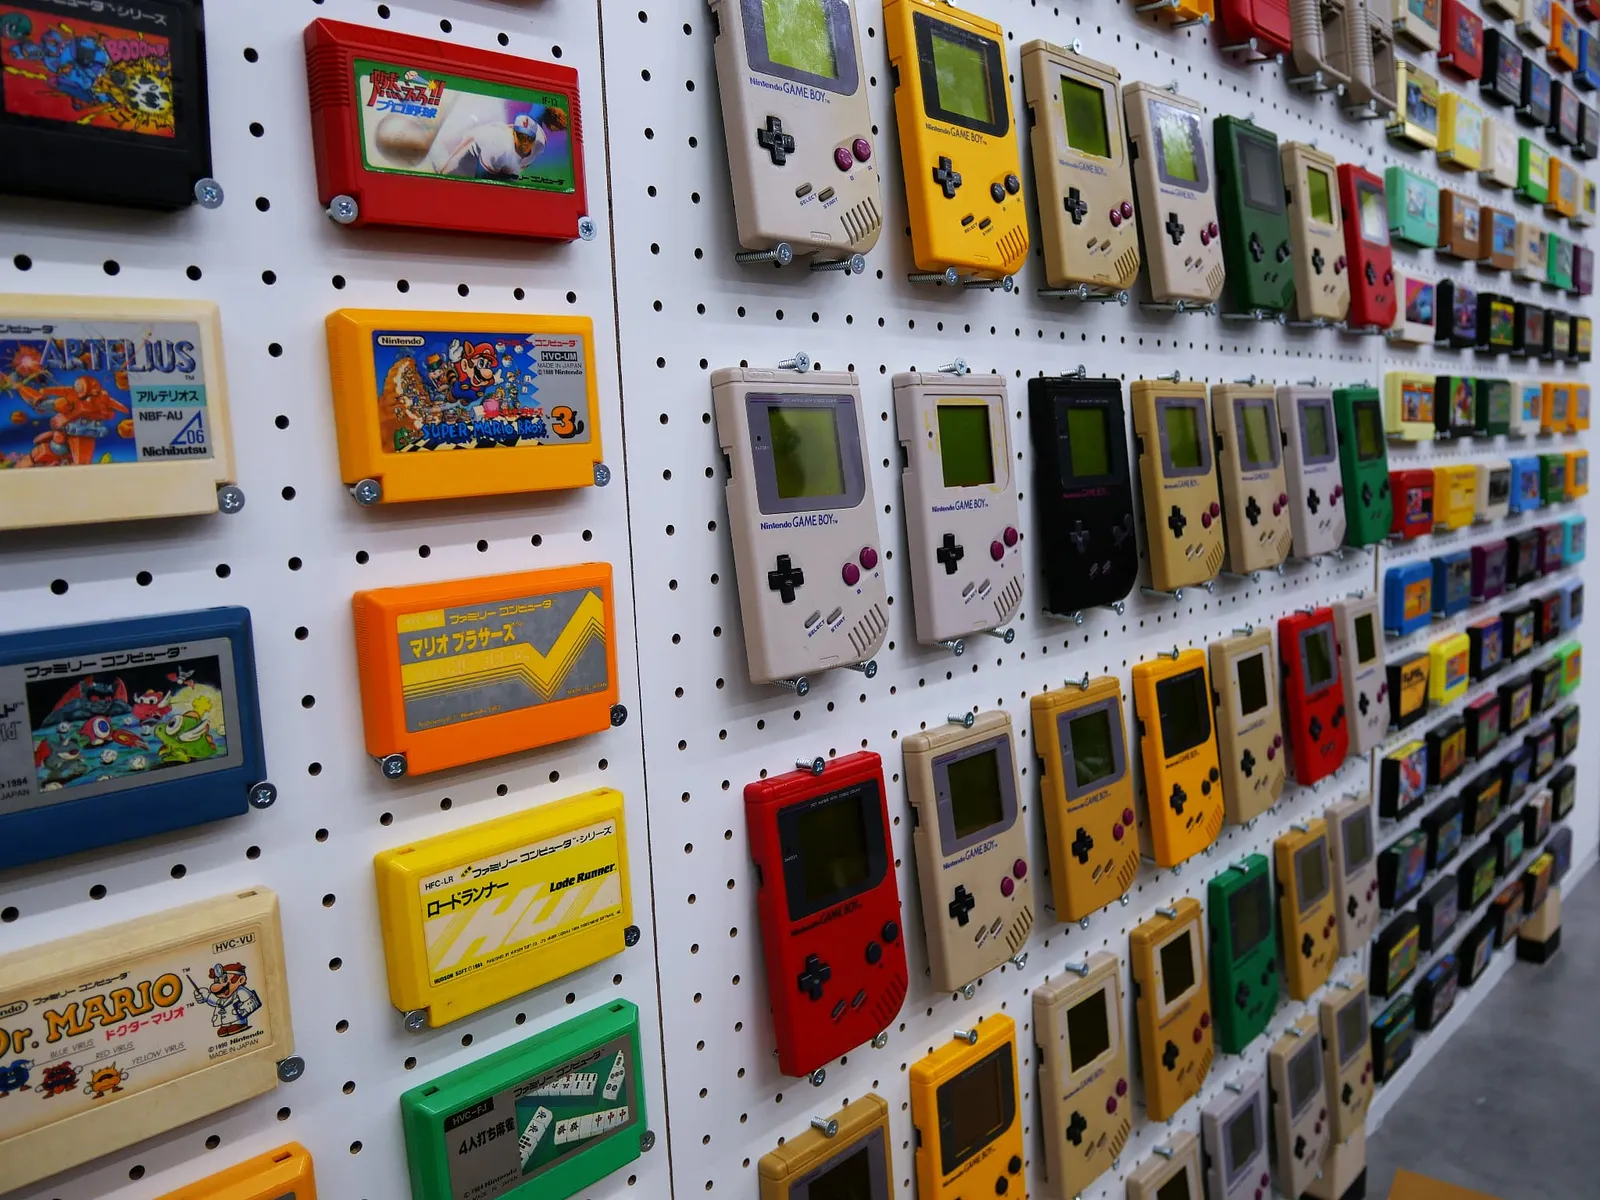
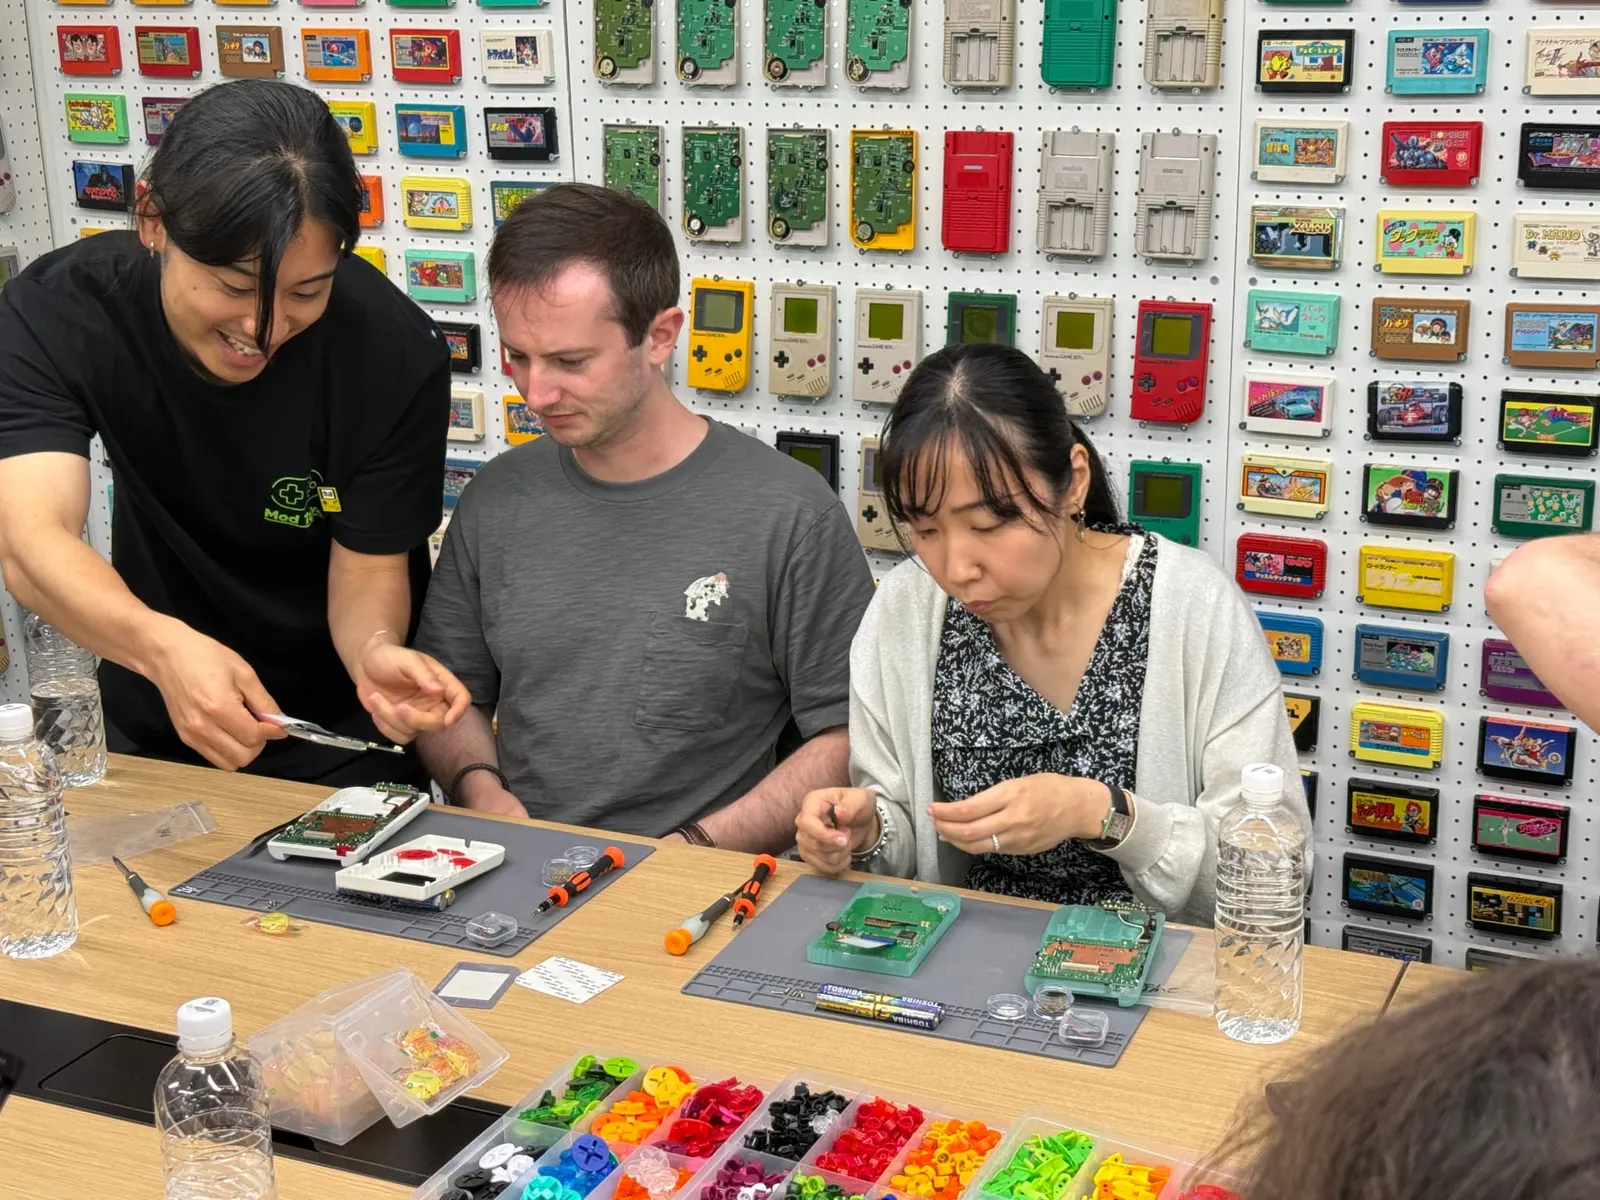
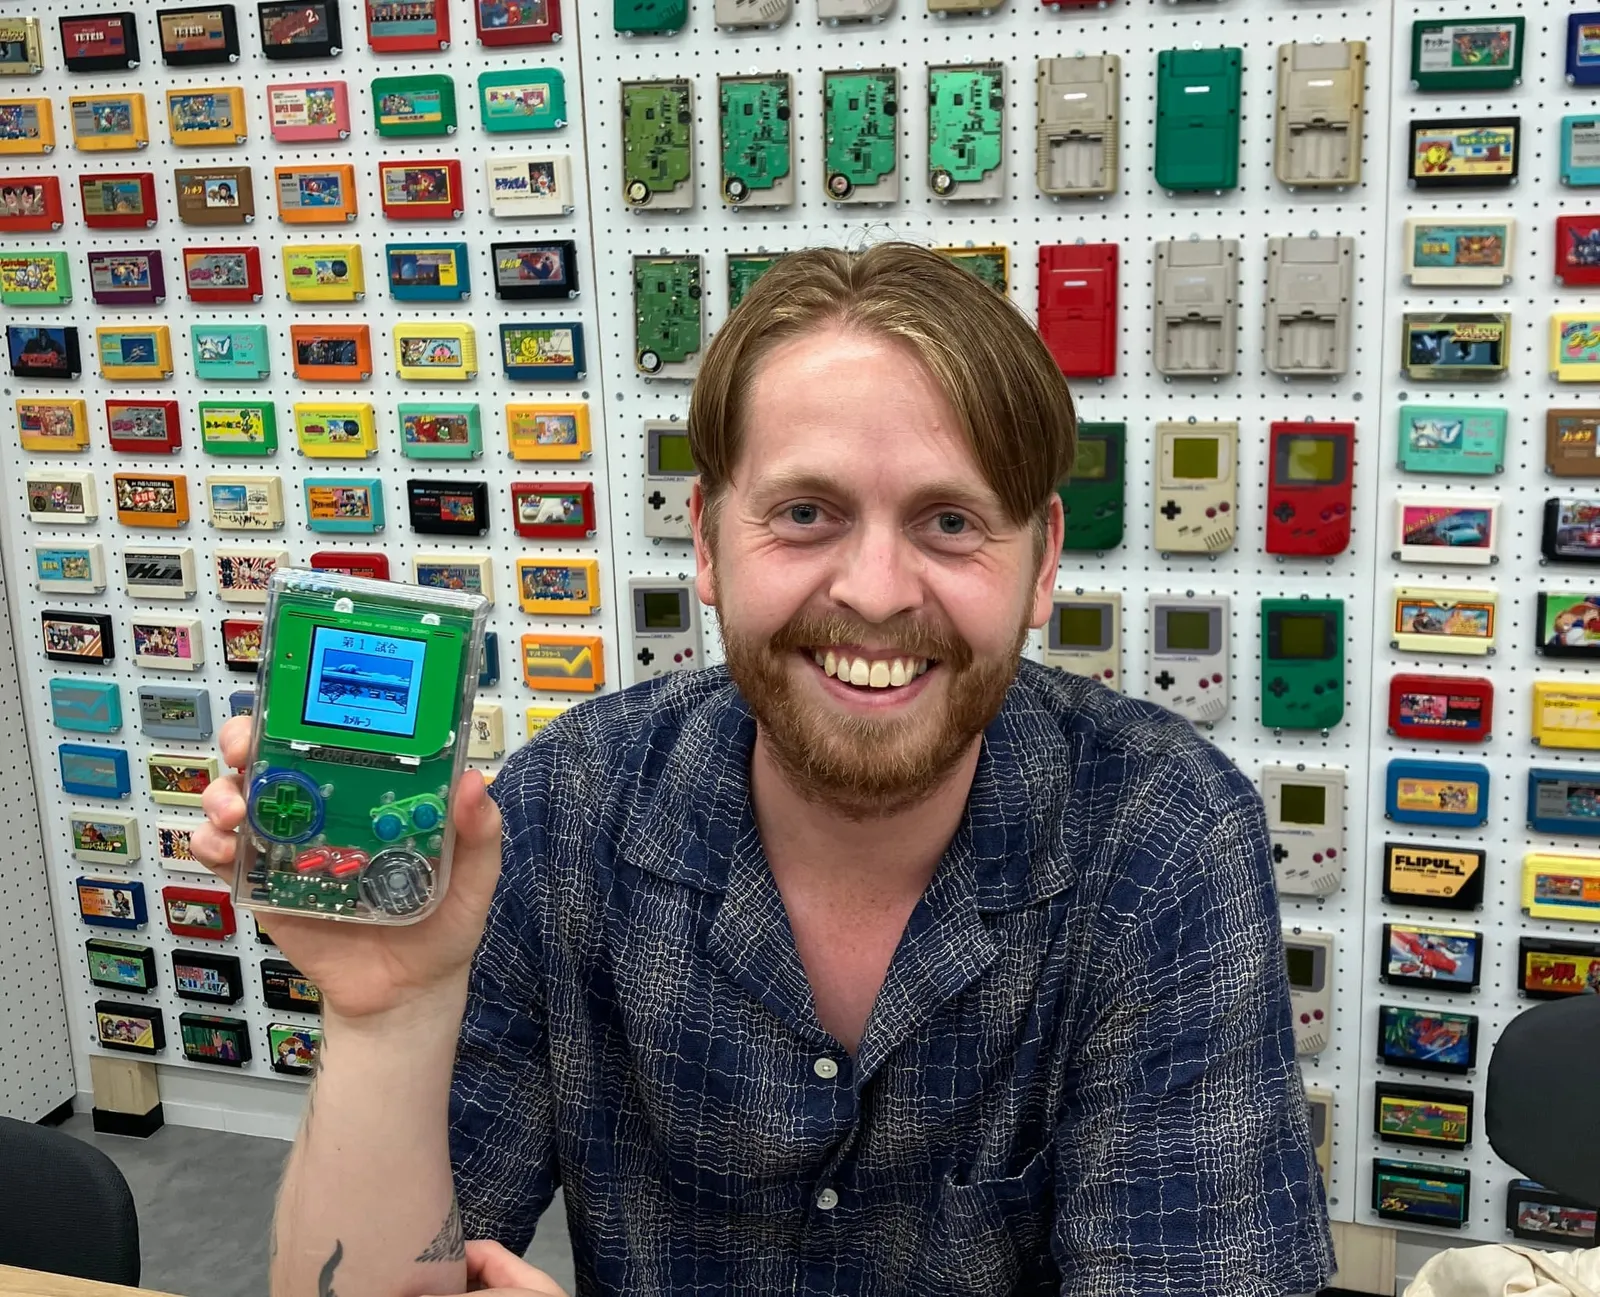
Step inside and the first thing you'll notice is a wall covered in Game Boy consoles and Famicom/Game Boy cartridges. Colors and circuit boards from every era line the shelves, and the excitement of "I'm going to build my own console here" starts building before you even sit down at the table.
After taking in this wall and learning a bit about the era of the machine you're about to work on, you'll head to your workstation.
At your seat, the real console and tools are neatly laid out
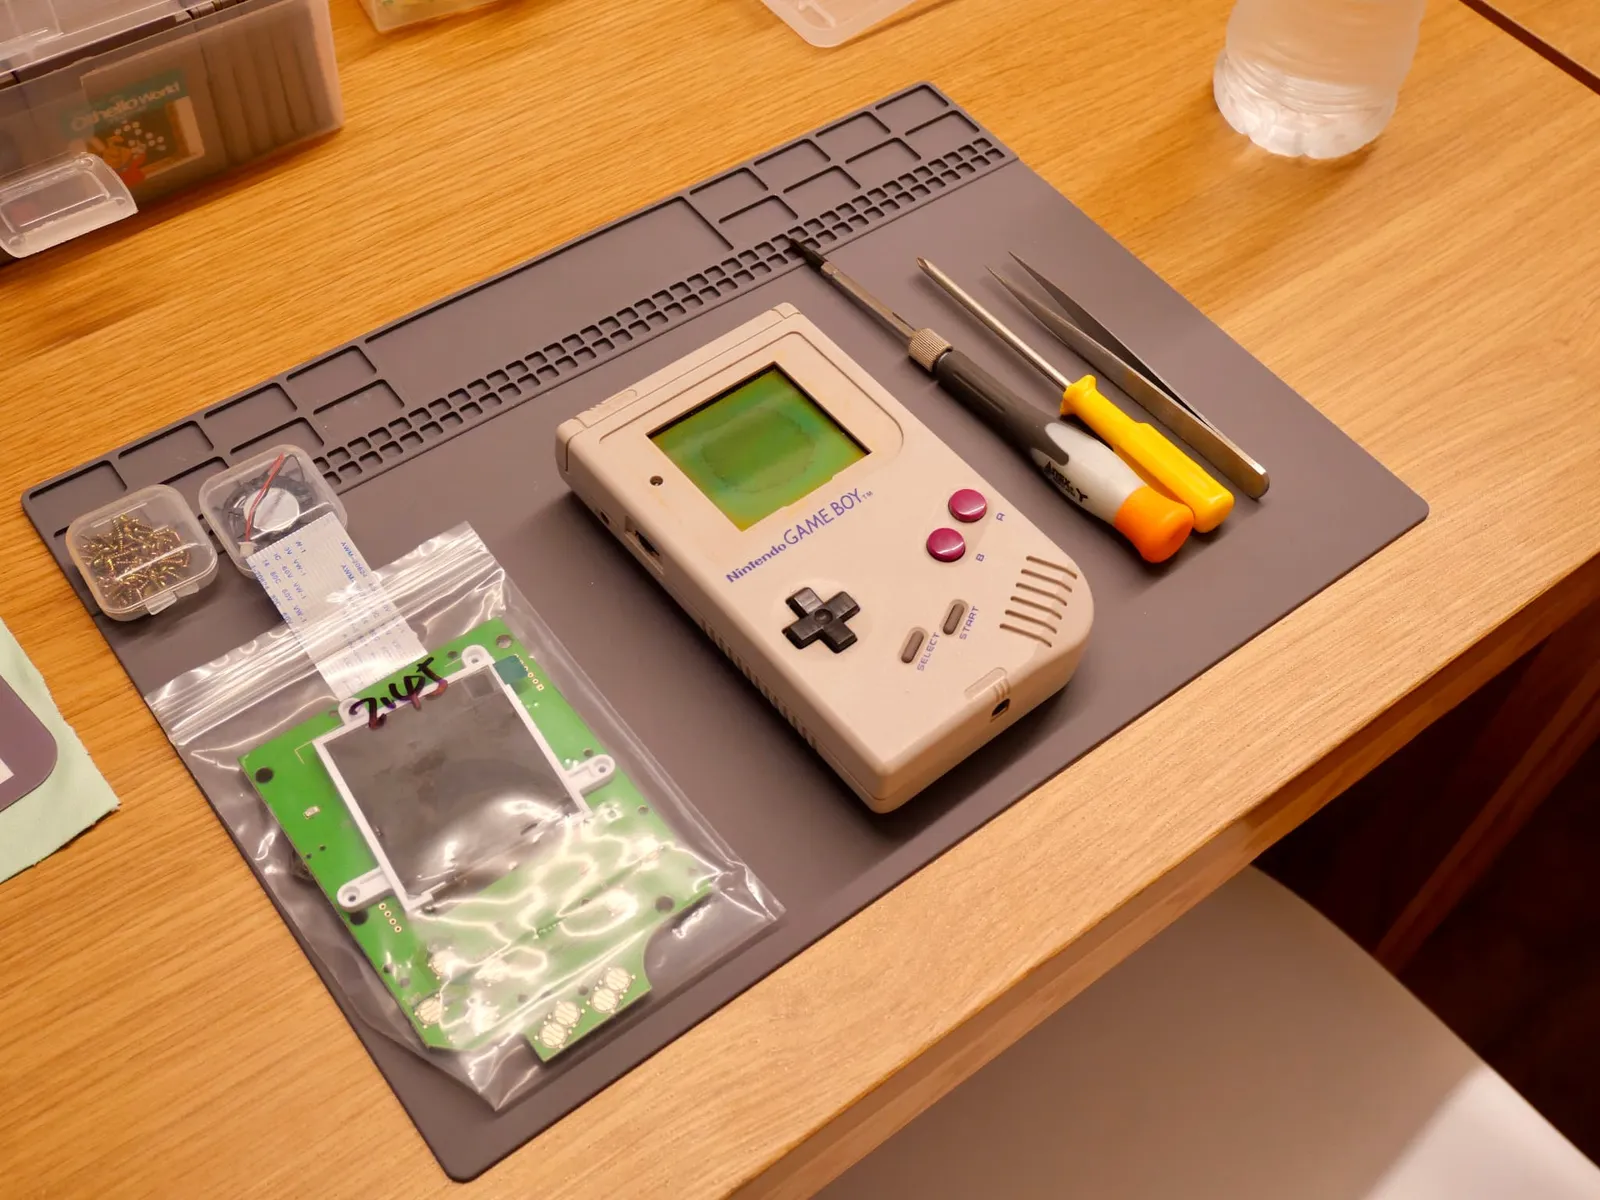
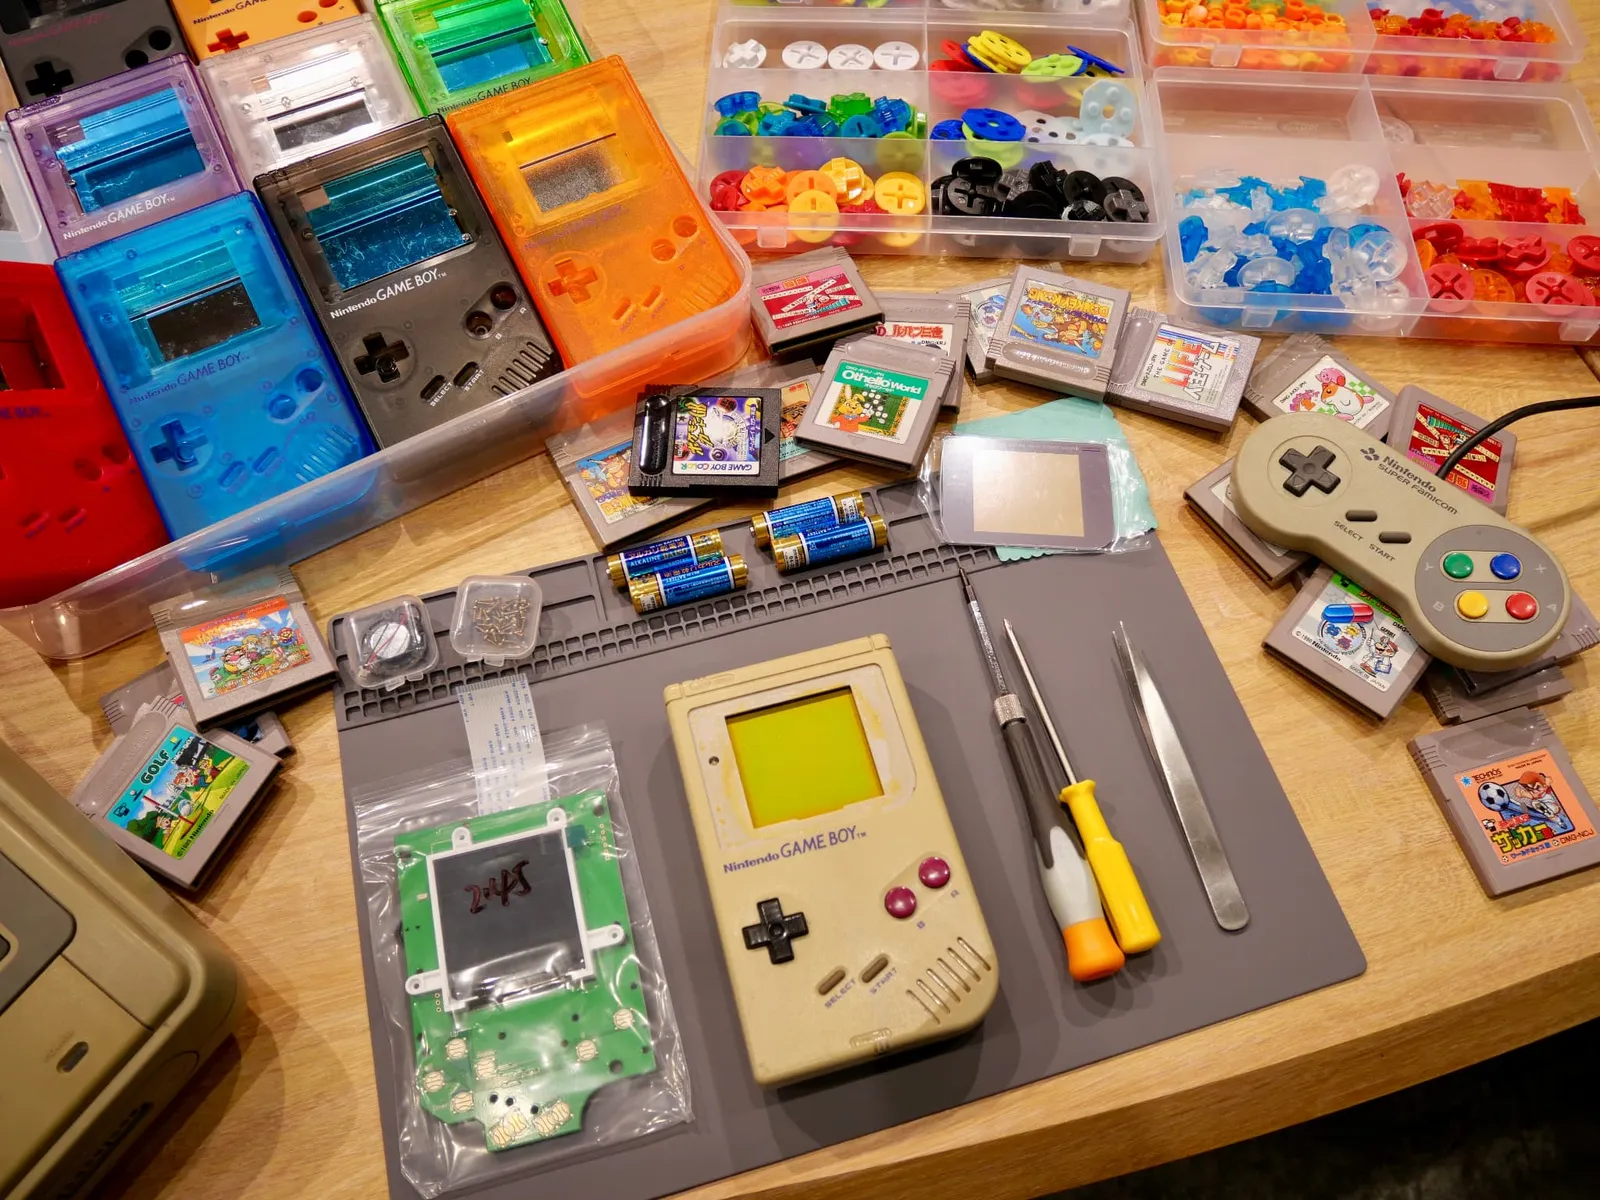
At your seat you'll find a silicone work mat, an original Game Boy (DMG-01), screwdrivers, tweezers, screws, and a backlit IPS screen kit, all set up in advance. Since every tool and part is provided, there's nothing you need to bring—come as you are.
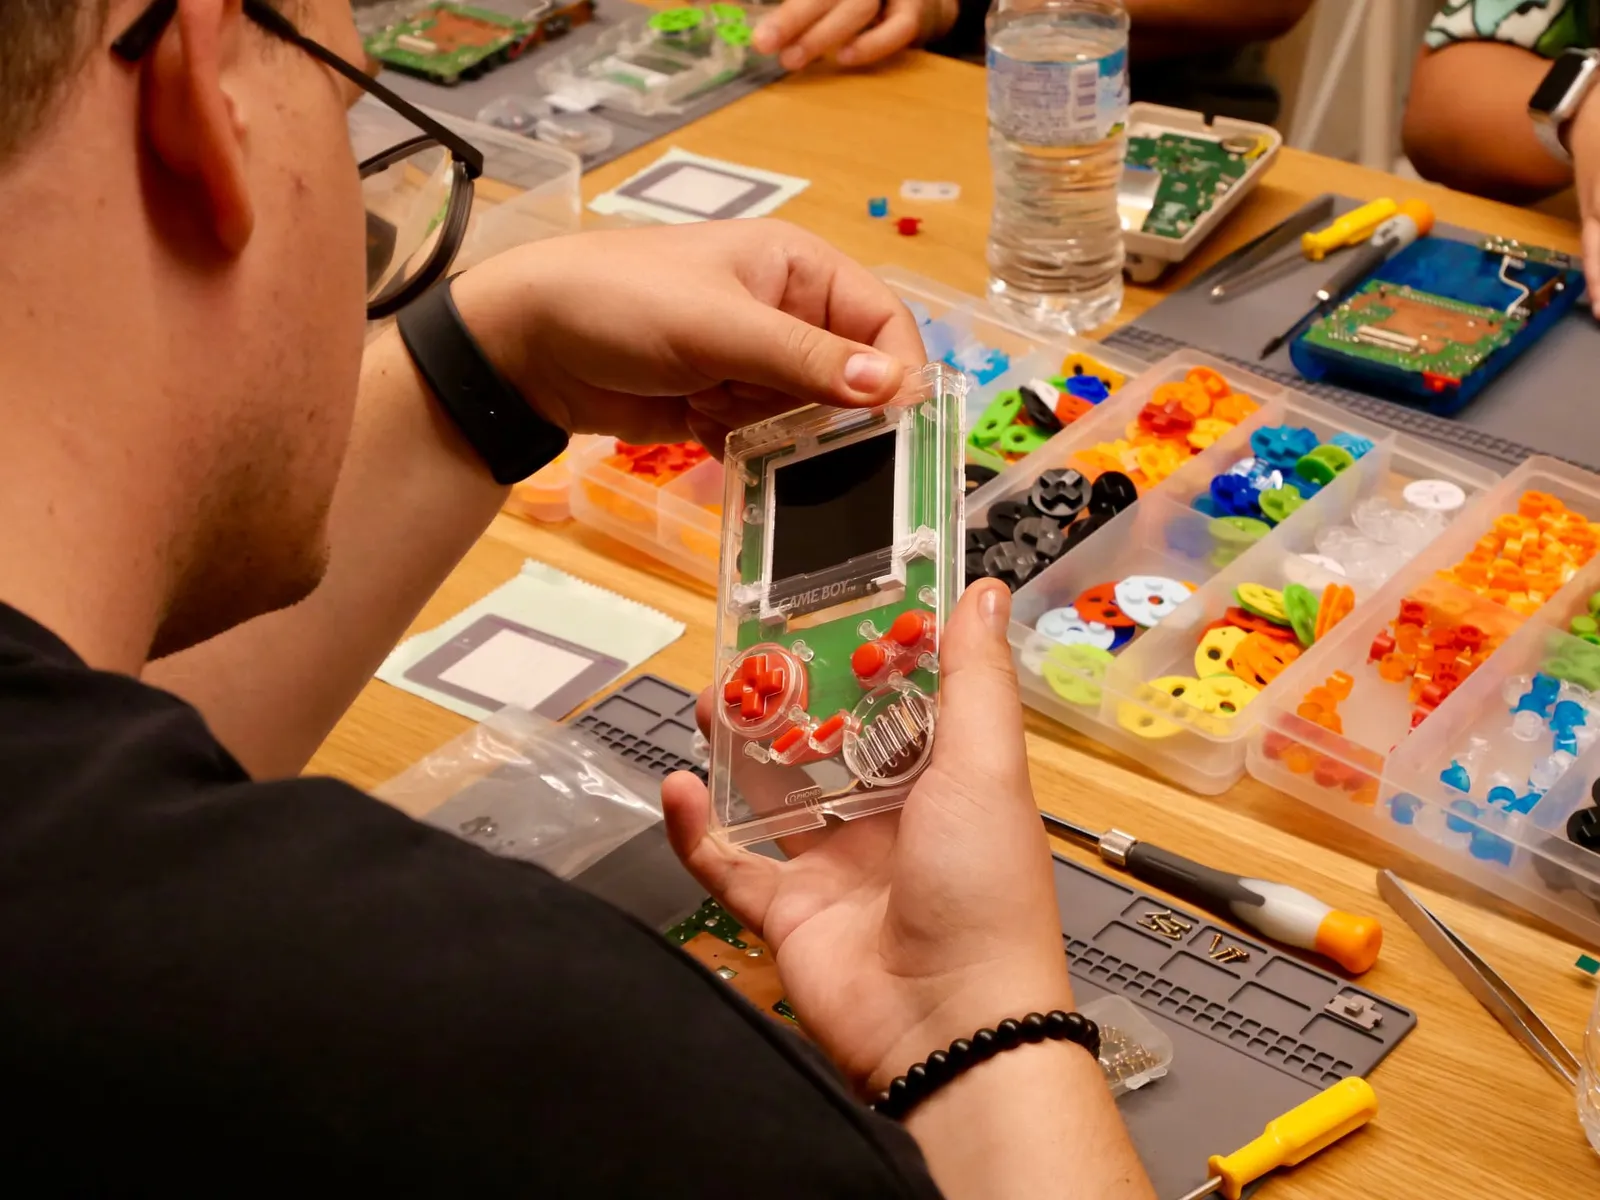
Around the table, cases display shells in clear, orange, blue and other colors, along with colored buttons and D-pad parts, plus some classic cartridges on hand. Every unit is tested and confirmed working before the session begins.
The experience starts with simply looking over these parts and imagining what your finished console will look like.
Time to disassemble—one screw at a time, with English guidance
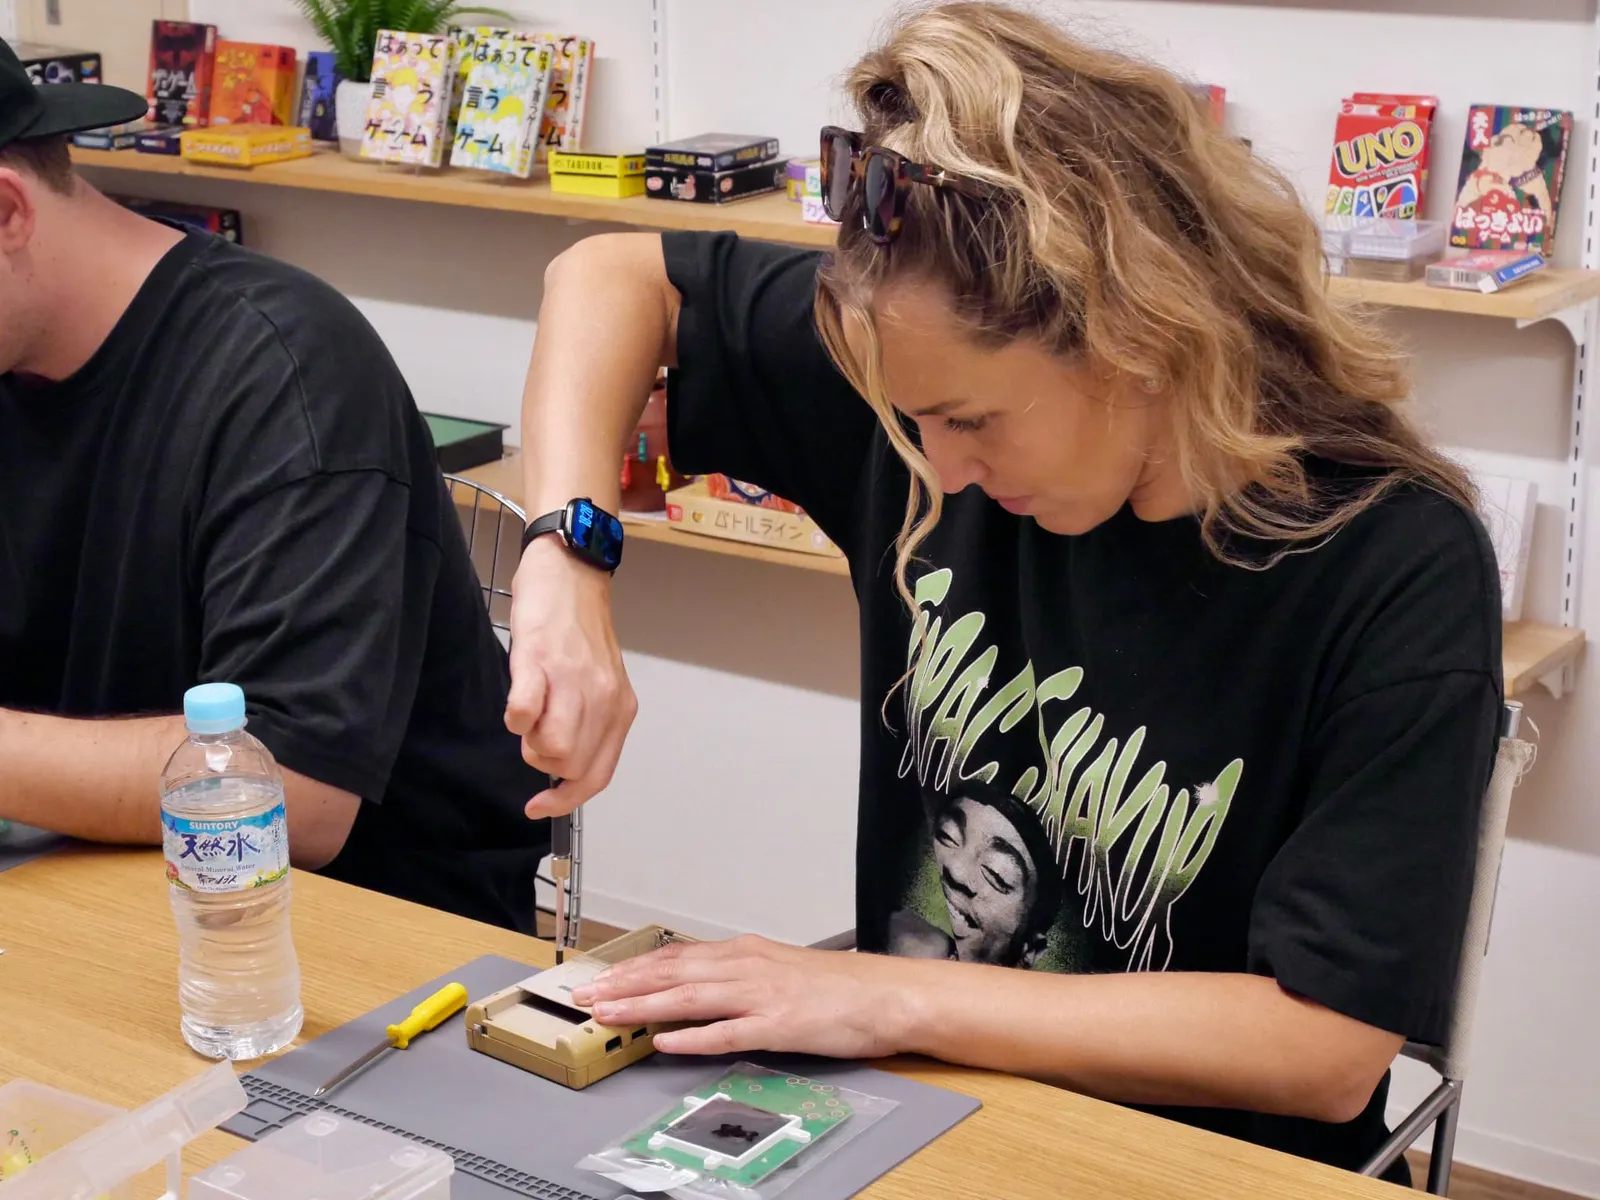
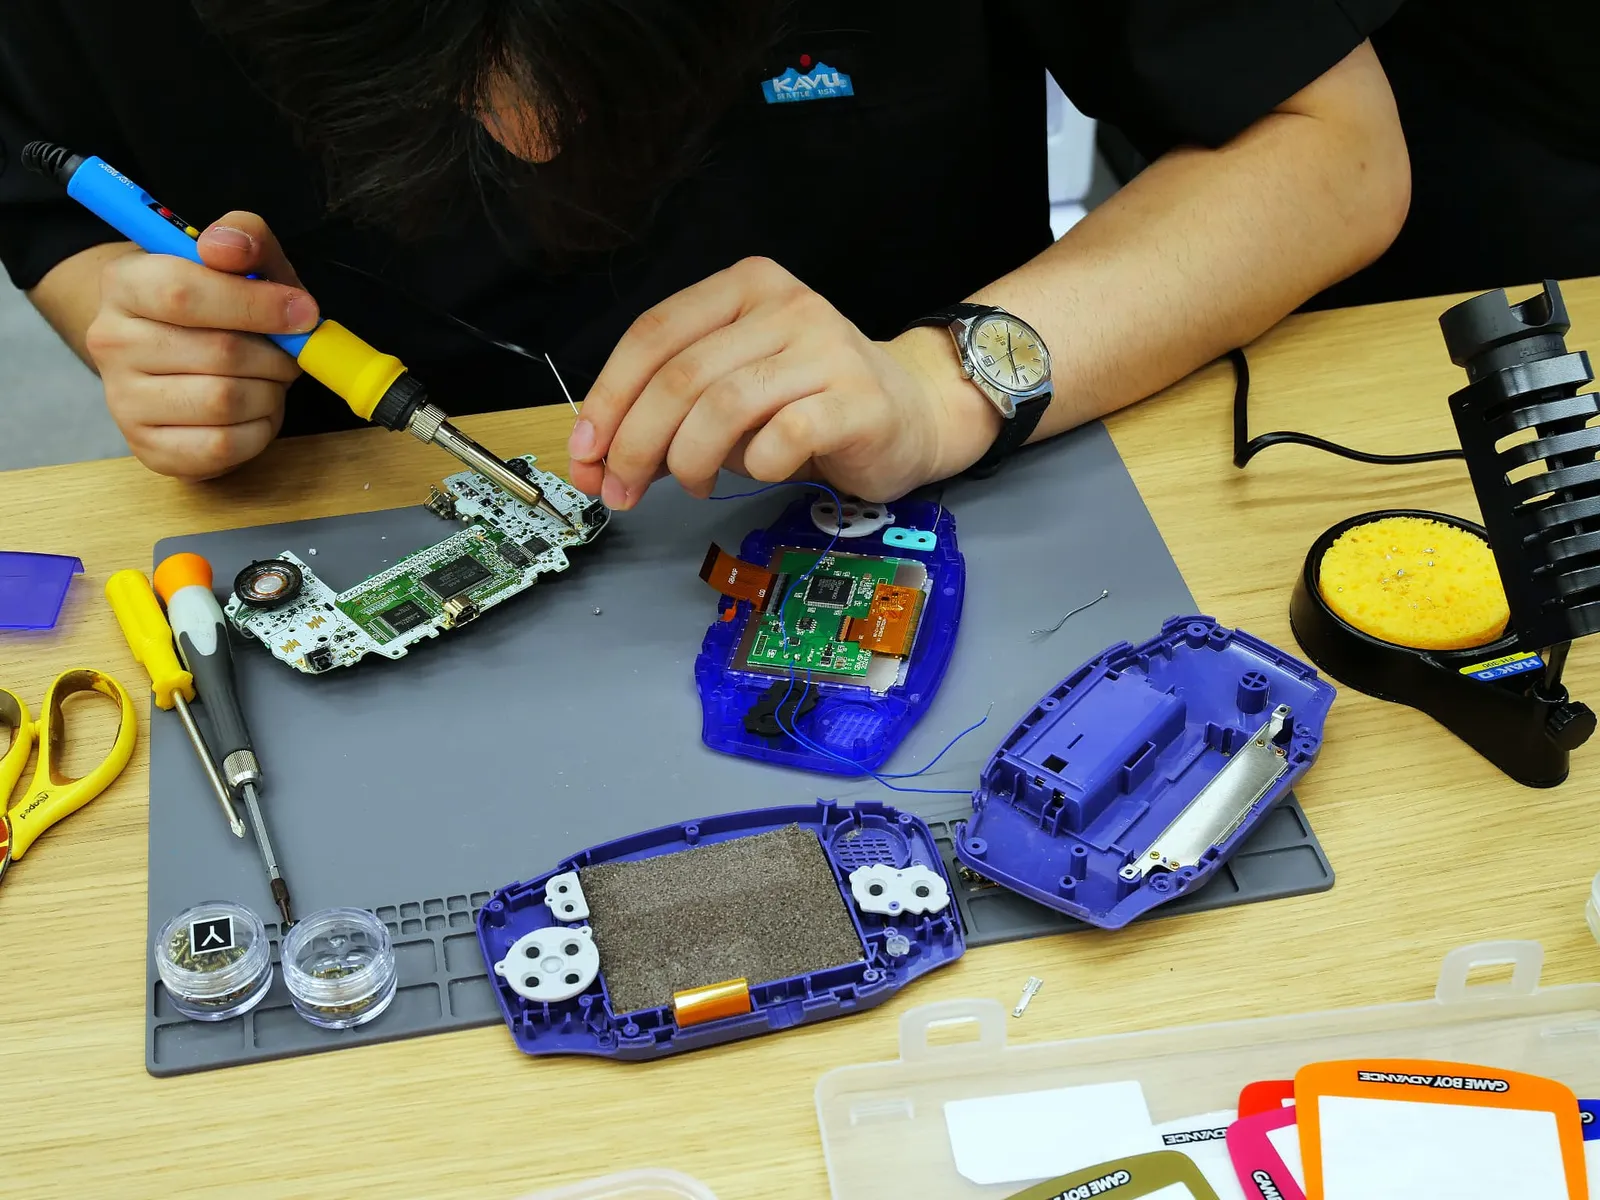
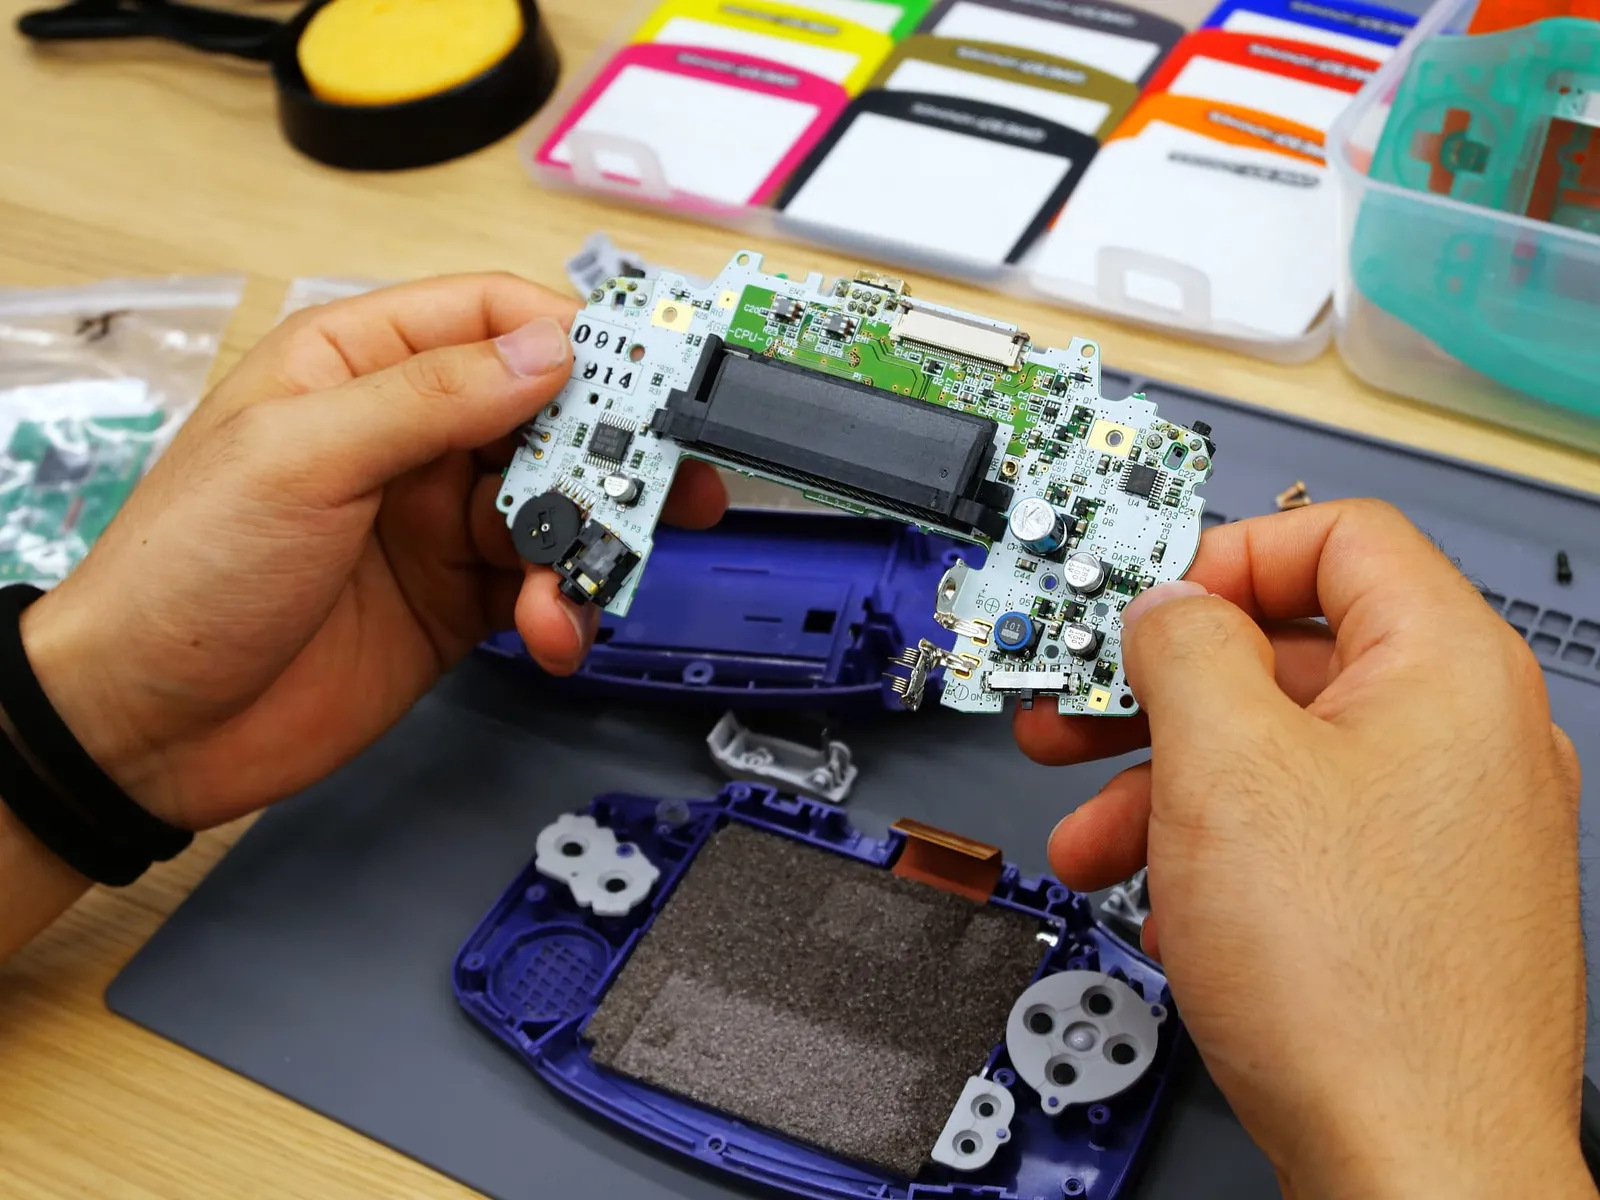
The workshop is led step by step by English-speaking staff who are genuine gaming enthusiasts, and no prior electronics experience is needed. You'll start by removing the screws on the back to open the console, then take out the circuit board, screen, and rubber button parts.
Because the groups are kept small, staff are quick to step in whenever you get stuck, showing you exactly how to handle each screw and cable. Even when using tweezers to grip tiny parts, you'll be guided on exactly where everything fits.
The feeling of a machine coming apart in your own hands is a very different experience from simply buying a finished product. Once you've learned the internal structure, next comes rebuilding it in the colors you love.
Create a one-of-a-kind combination with an IPS screen and colored parts
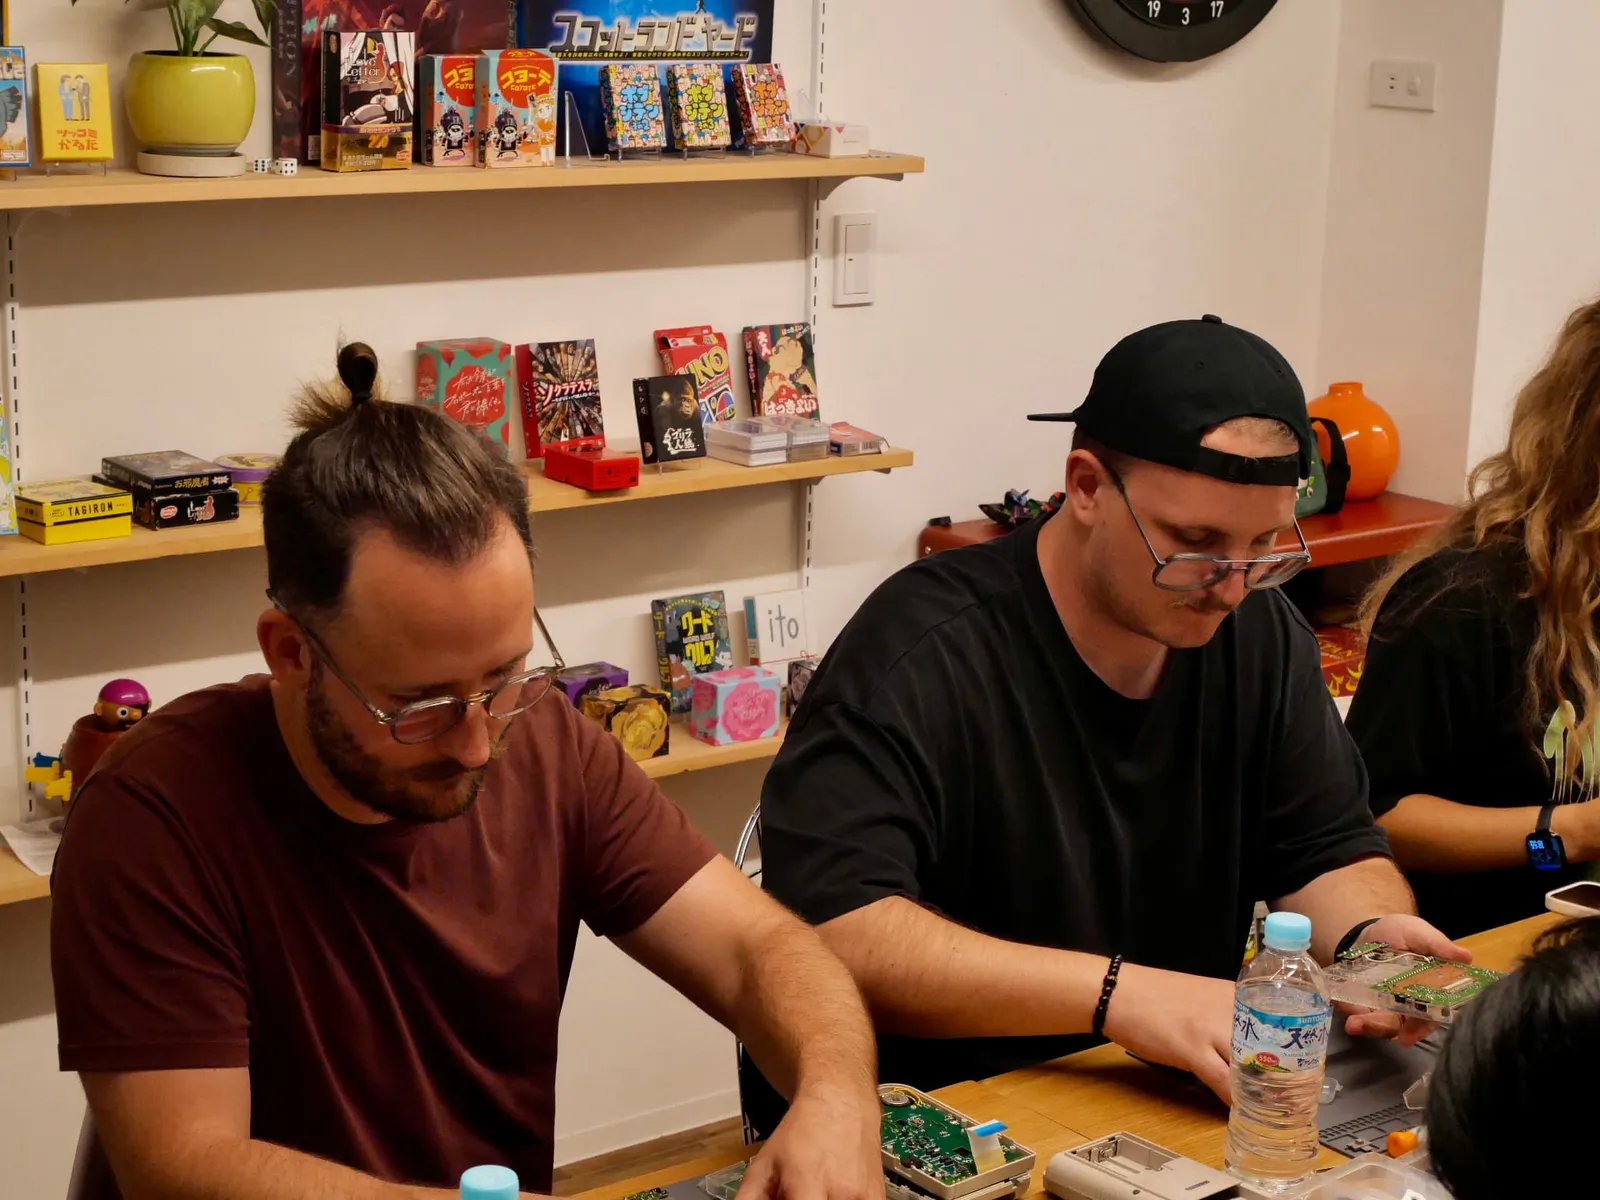
The heart of this experience is installing the backlit IPS screen and choosing your shell and button colors. You'll choose at the time of booking between the original 1989 DMG-01 or the widescreen Game Boy Advance.
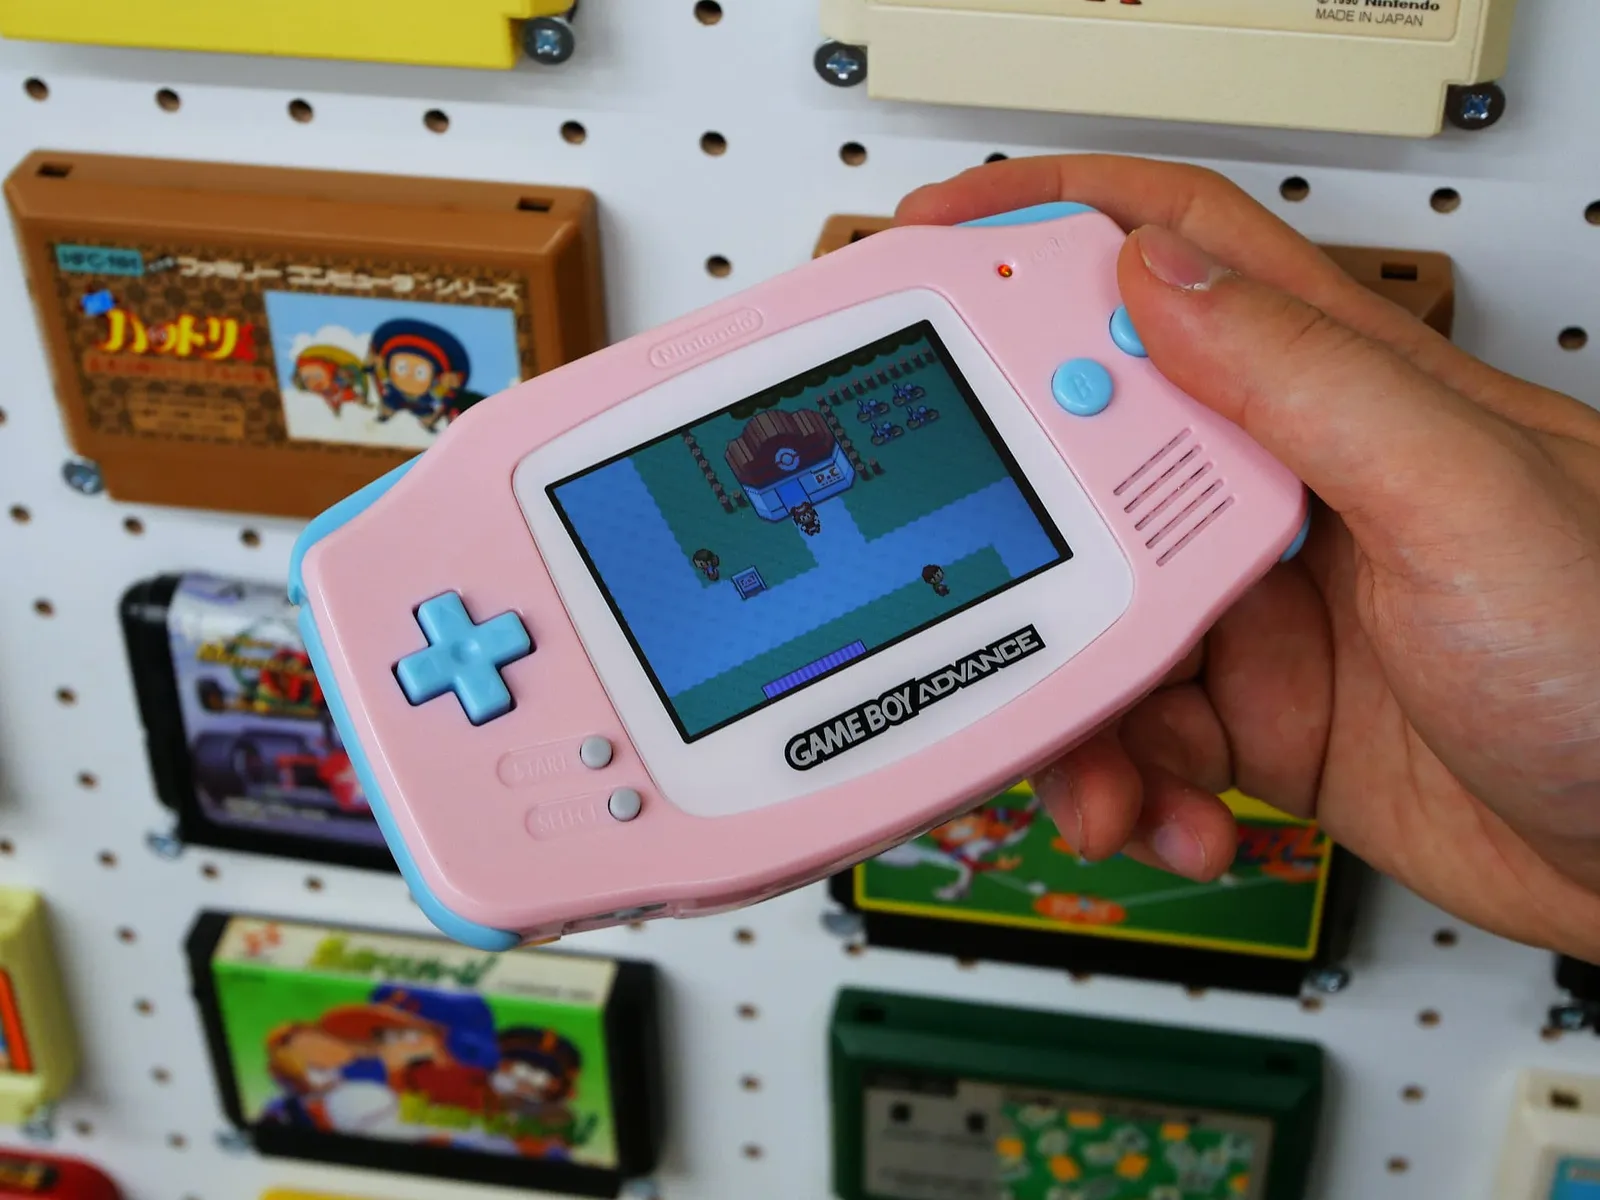
For the Game Boy Advance, the process includes wiring and soldering, all supported by staff, as you connect the circuit board to the new shell and screen. With choices down to individual button colors—orange, clear, or a pink-and-blue combination, for example—no two finished consoles are ever quite the same.
Swapping in a high-definition screen also means the display becomes far easier to see than the original—one of the real highlights of this mod.
The moment you power it on—play it right away, then take it home
The biggest thrill comes when you power on your finished console and the screen lights up. The Game Boy you took apart springs back to life, now in the colors you chose and with a brand-new screen. Because you've built it all with your own hands, that first moment of the screen lighting up becomes a real highlight of the experience.
Once finished, you can insert a classic Game Boy or Game Boy Advance cartridge and actually play it. Take a commemorative photo, and then simply bring your creation home as a souvenir of your trip.
Companions who aren't taking part in the workshop can sit in for free, and observers are welcome. It's also a fun way for families to build together—recreating the console you grew up playing, this time with your own kids.
Frequently Asked Questions
■How long does it take? The original Game Boy takes about 2 hours, and the Game Boy Advance about 2.5 hours. Arriving 10 minutes before the start time is recommended.
■Do I need any electronics experience? None at all. All tools and parts are provided, and staff support you through every step.
■Do I need to bring anything? No special items are needed—come empty-handed in whatever you're wearing.
■Can children take part? Yes, from age 6. Minors must be accompanied by a guardian.
■Can non-participating companions join? Yes. Companions who aren't taking part can observe for free.
■How do I get there? About a 2–3 minute walk from JR Kanda Station, or about 10–13 minutes from Akihabara Station.
What to check before booking
- The model you choose at booking (DMG-01 or Game Boy Advance)
- Your preferred shell and button color combination
- The start time, and arriving 10 minutes early
- The meeting point (about a 2-minute walk from JR Kanda Station)
- Languages supported (English and Japanese)
- Participants' ages and whether a guardian is required
- Number of companions joining you
- How to carry your finished console home (padding or extra bag space)
- How cartridge play time is handled
- Cancellation and change policies
- The latest pricing and plan details
Pricing, session times, and plan details may change depending on the season. Please check the latest information before booking.
In summary
This is a workshop in Akihabara, Tokyo, where you take apart a vintage Game Boy with your own hands and rebuild it with an IPS screen and shell/buttons in the colors of your choice. All tools and parts are provided, so no electronics experience is required. With small groups supported by English- and Japanese-speaking staff, even first-timers can move at their own pace.
Once assembly is complete, it's time to power it on and check that everything works. Play a classic game right there on the console you built yourself, then take it home with you.
This experience suits anyone who wants a travel keepsake that they took apart, chose, and assembled themselves—rather than simply buying a finished product.
Cultural Experiences in Tokyo
Tokyo: Custom Game Boy Modification Workshop in Akihabara (Original/Advance)
Check the booking page for the latest schedules, prices, and plan details.